

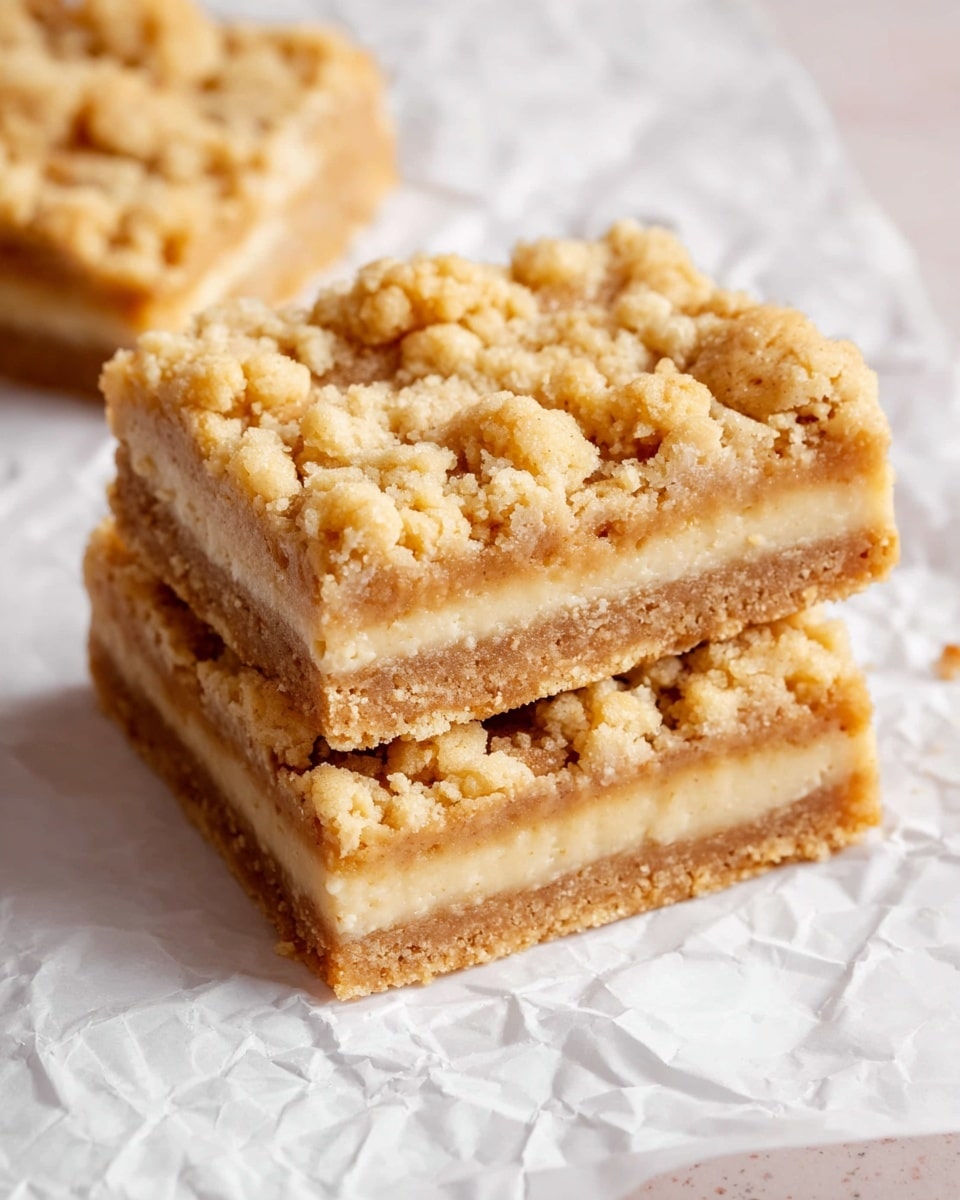
If you’re on the hunt for a treat that combines comfort, nostalgia, and a touch of wholesome goodness, this Peanut Butter Oatmeal Bars Recipe is your new best friend. Imagine chewy oats, rich peanut butter, and just the right hint of brown sugar all baked into a perfectly textured bar that’s easy to slice and impossible to resist. Whether you need an afternoon snack, a lunchbox addition, or a sweet pick-me-up, these bars deliver on flavor and satisfaction each time you make them.
Ingredients You’ll Need

The beauty of the Peanut Butter Oatmeal Bars Recipe lies in its simplicity and the quality of each ingredient. Every item on this list plays a vital role in building the perfect balance of flavors and textures — from the nutty oats to the melty butter that brings everything together.
- All-purpose/plain flour (1 cup / 150 g): Provides structure and a tender crumb to the bars.
- Old-fashioned rolled oats (1 cup / 80 g): Adds chewiness, fiber, and that irresistible wholesome texture.
- Sea salt (1/2 tsp): Enhances all the flavors and balances the sweetness.
- Baking/bicarb soda (1/2 tsp): Helps the bars rise just enough for a light bite.
- Butter, melted (1/2 cup / 125 g): Infuses richness and helps bind the ingredients perfectly.
- Brown sugar (1/3 cup / 70 g): Brings a deeper sweetness with a slight molasses hint.
- Vanilla bean paste (2 tsp): Adds warm, aromatic vanilla notes that lift the entire recipe.
- Peanut butter (1 cup): The star ingredient, preferably crunchy for extra texture and flavor bursts.
- Maple syrup (2 tbsp): Gives a natural sweetness and helps soften the peanut butter layer.
How to Make Peanut Butter Oatmeal Bars Recipe
Step 1: Prepare Your Oven and Pan
Start by preheating your oven to 175 degrees Celsius (350°F). Next, line an 8 x 8 inch (20 x 20 cm) baking dish with non-stick baking paper, making sure to leave an overhang on the sides. This clever step makes lifting your bars from the pan a smooth, stress-free experience later on.
Step 2: Mix Your Dry Ingredients
In a medium-sized bowl, combine the all-purpose flour, rolled oats, sea salt, and baking soda. Whisk these together until evenly mixed — this sets the foundation for perfectly balanced bars packed with texture and flavor.
Step 3: Combine the Wet Ingredients
Melt the butter and transfer it to a separate bowl. Stir in the brown sugar and vanilla bean paste until everything is fully incorporated. The warmth of the melted butter helps dissolve the sugar and releases the vanilla aroma that makes these bars feel extra special.
Step 4: Bring It All Together
Pour the wet mixture into the bowl with your dry ingredients. Use a sturdy spoon or your hands to mix everything until it forms a consistent, slightly sticky dough. This is the moment where flavor and texture start to come alive.
Step 5: Form the Base and Start Baking
Firmly press around three quarters of the mixture into your prepared baking dish. Keep about 100 grams (roughly a half cup, firmly packed) of the mixture aside — you’ll need this for the topping later. Bake the base for 10 minutes to give it a nice head start on baking and set the stage for the peanut butter layer.
Step 6: Prepare the Peanut Butter Layer
While your base is baking, mix the peanut butter and maple syrup in a small bowl. If your peanut butter feels too thick, pop it in the microwave for a few seconds to loosen it up. This step ensures you’ll easily spread a smooth, glossy layer over the baked base.
Step 7: Add the Peanut Butter and Topping Crumble
When the base comes out of the oven, immediately spread the peanut butter mixture over it. Then, crumble the reserved oat mixture over the top using your fingers. This crumbly topping gives the bars an irresistible finish, with just the right amount of crunch.
Step 8: Final Bake and Cool Down
Return the tray to the oven and bake for another 10 minutes, until the topping is golden and cooked through. Once done, let the bars cool on your countertop for 30 minutes. This resting time helps the bars firm up before chilling.
Step 9: Chill and Slice
Pop the bars into the fridge for at least 30 minutes until fully chilled. Cutting the bars too warm will make them fall apart, so patience here pays off. Once cooled, lift the bars from the pan using the parchment overhang and slice into nine squares.
How to Serve Peanut Butter Oatmeal Bars Recipe
Garnishes
A simple dusting of powdered sugar adds a little visual delight and subtle sweetness, but you can also sprinkle chopped peanuts or a drizzle of melted chocolate to ramp up the appeal and texture contrast.
Side Dishes
These bars pair beautifully with a cup of fresh herbal tea, a cold glass of milk, or even a scoop of vanilla ice cream for a more indulgent dessert option.
Creative Ways to Present
Try stacking the bars with layers of fresh fruit and yogurt for a quick parfait or cut them into bite-sized pieces for party platters. Wrapping individual bars in parchment makes them a perfect grab-and-go snack for busy days.
Make Ahead and Storage
Storing Leftovers
Keep any leftover Peanut Butter Oatmeal Bars in an airtight container in the fridge. They’ll stay fresh and chewy for up to 5 days, making them perfect for snacking throughout the week.
Freezing
If you want to save bars for later, freeze them in a single layer on a baking sheet first, then transfer to a freezer-safe bag. They can last up to 3 months frozen, so you’ll always have a delicious treat on hand.
Reheating
To enjoy bars warm, simply microwave for 15 to 20 seconds or bake at a low heat until heated through. This brings back that freshly baked goodness without drying them out.
FAQs
Can I use natural peanut butter instead of crunchy?
Absolutely! Using natural peanut butter will change the texture slightly, making the peanut butter layer smoother and creamier, but it will still be delicious. Just make sure to stir it well before using.
Is there a gluten-free option for this recipe?
Yes! You can substitute the all-purpose flour with a gluten-free flour blend and use certified gluten-free rolled oats to keep this recipe suitable for gluten-sensitive folks.
Can I make these bars vegan?
Definitely. Swap butter for a vegan alternative like coconut oil or vegan margarine, and use maple syrup or another vegan sweetener instead of honey. The texture and flavor will still be delightful.
How long do the bars last at room temperature?
Because of the butter and peanut butter content, it’s best to store the bars in the fridge to keep them fresh and prevent them from getting too soft. At room temperature, aim to consume them within a day or two.
Can I add mix-ins like chocolate chips or dried fruit?
Yes! Adding chocolate chips, raisins, or even chopped nuts can give your bars extra bursts of flavor and texture. Just fold them into the mixture before pressing the base layer into the pan.
Final Thoughts
I cannot recommend this Peanut Butter Oatmeal Bars Recipe enough if you love that perfect blend of chewy, nutty, and sweet all wrapped up in a convenient bar. It’s a recipe that feels like a warm hug with every bite, easy enough to make on a whim and impressive enough to share with friends and family. Give it a go—you might just find your new go-to snack or dessert!
Print
Peanut Butter Oatmeal Bars Recipe
These Peanut Butter Oatmeal Bars are a deliciously chewy and wholesome treat combining the nuttiness of peanut butter with the hearty texture of rolled oats. Perfect as a snack or a sweet breakfast option, they feature a buttery oat base topped with a smooth peanut butter layer and a crumbly oat topping, baked to golden perfection.
- Total Time: 1 hour 30 minutes
- Yield: 9 servings
Ingredients
Dry Ingredients
- 1 cup (150 g) all-purpose/plain flour
- 1 cup (80 g) old-fashioned rolled oats
- 1/2 tsp sea salt
- 1/2 tsp baking/bicarb soda
Wet Ingredients
- 1/2 cup (125 g) butter – melted
- 1/3 cup (70 g) brown sugar
- 2 tsp vanilla bean paste
- 1 cup peanut butter (preferably crunchy)
- 2 tbsp maple syrup
Instructions
- Preheat Oven: Preheat your oven to 175°C (350°F) to ensure it’s at the right temperature when ready to bake.
- Prepare Baking Dish: Line a 20 x 20 cm (8 x 8 inch) baking dish with non-stick baking paper, leaving an overhang for easy removal of the bars later.
- Mix Dry Ingredients: In a medium bowl, combine the flour, rolled oats, sea salt, and baking soda; mix thoroughly to distribute evenly.
- Combine Wet Ingredients: Melt the butter and add it to another bowl along with the vanilla bean paste and brown sugar; stir to blend well.
- Combine Mixtures: Add the wet mixture to the dry ingredients and mix until well combined into a cohesive dough.
- Press Base Layer: Reserve about 1/4 of the mixture (approximately 100 g or a firmly packed 1/2 cup). Firmly press the remaining 3/4 of the mixture evenly into the bottom of the prepared baking dish. Bake this base for 10 minutes.
- Prepare Peanut Butter Topping: While the base bakes, mix the peanut butter and maple syrup in a small bowl. If the peanut butter is thick, warm it briefly in the microwave to soften for easier spreading.
- Layer Peanut Butter: Remove the partially baked base from the oven and immediately spread the peanut butter mixture evenly over it.
- Add Crumble Topping: Crumble the reserved oat mixture over the peanut butter layer using your fingers for a crumbly topping.
- Bake Bars Fully: Return the baking dish to the oven and bake for an additional 10 minutes or until the topping is cooked through and a light golden brown.
- Cool Bars: Remove the bars from the oven and let them cool for 30 minutes at room temperature.
- Chill and Cut: Refrigerate the bars for another 30 minutes or until completely cool before cutting into squares to prevent crumbling.
Notes
- Note 1: All-purpose flour can be substituted with gluten-free flour for a gluten-free version, but texture may slightly vary.
- Note 2: Using old-fashioned rolled oats provides the ideal texture; instant oats may result in a less chewy bar.
- Note 3: Crunchy peanut butter adds a nice texture contrast, but smooth peanut butter can be used if preferred.
- Note 4: Maple syrup adds natural sweetness; honey can be substituted but will slightly change flavor.
- For best results, avoid cutting the bars while they are warm to maintain their shape.
- Use parchment paper with an overhang for easy removal of bars from the baking dish.
- Prep Time: 15 minutes
- Cook Time: 20 minutes
- Category: Snack
- Method: Baking
- Cuisine: American


