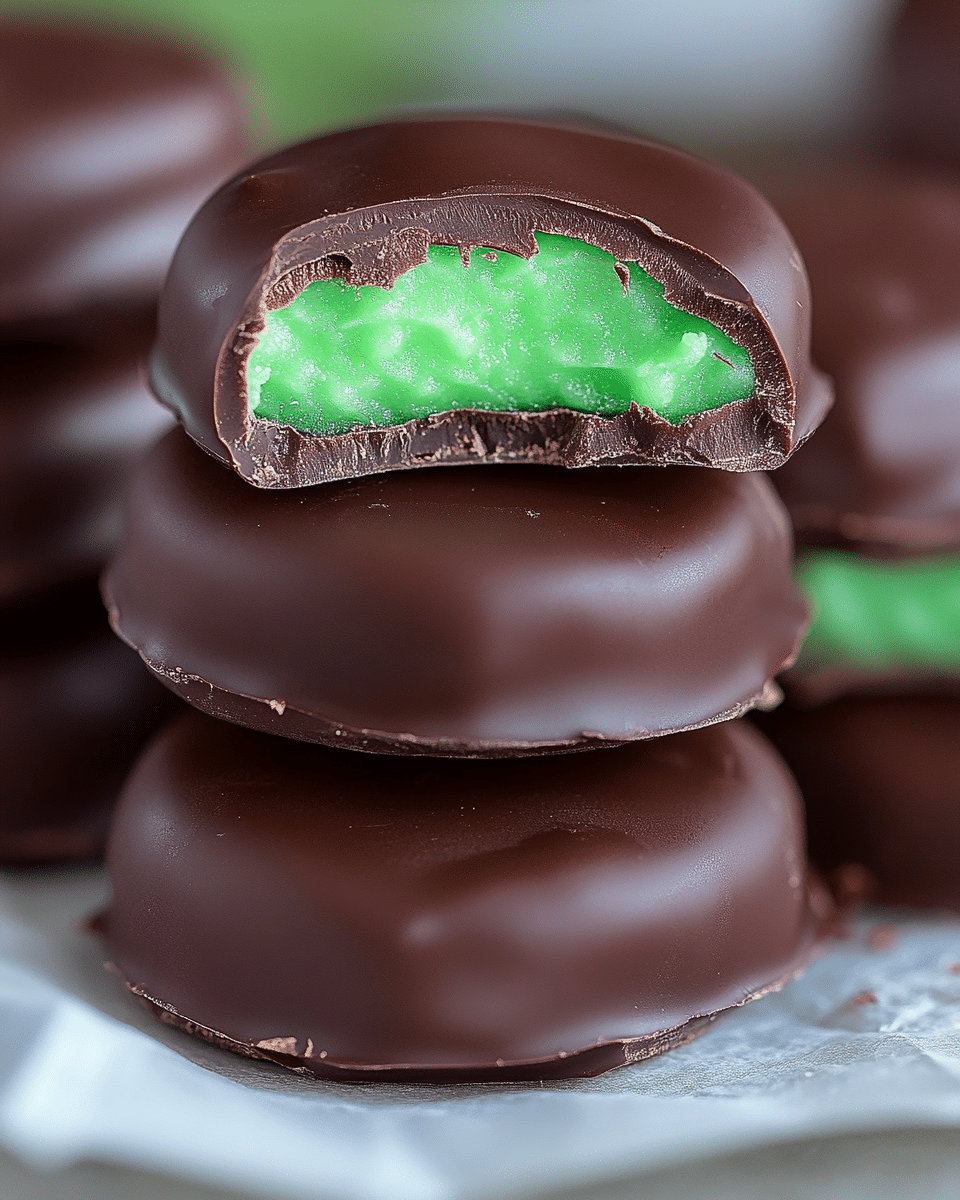
These rich and creamy homemade mint patties are coated in chocolate for a refreshing and indulgent treat. Perfect for the holidays or anytime you want a sweet, minty snack!
Why You’ll Love This Recipe
These Chocolate Covered Mint Patties are a perfect balance of cool mint and rich chocolate. They’re easy to make, require only a few ingredients, and taste like a treat from your favorite candy shop. These are great for gifting or simply satisfying your mint-chocolate cravings.
Ingredients
For the Mint Filling:
1/3 cup light corn syrup
5 tablespoons butter, softened
1 ½ teaspoons mint extract
½ teaspoon salt
Green food coloring (start with a couple drops and add more to reach desired color)
4–5 cups powdered sugar
For the Coating:
10 oz chocolate candy coating (such as CandiQuik)
(Tip: You’ll find the full list of ingredients and measurements in the recipe card below.)
Directions
-
Make the Mint Filling: In a medium-sized bowl, combine corn syrup, butter, mint extract, salt, and food coloring. Stir until well combined.
-
Add Powdered Sugar: Gradually stir in 1 cup of powdered sugar at a time until the mixture becomes too stiff to stir. Continue adding powdered sugar and knead the mixture until it no longer sticks to your hands.
-
Shape the Patties: Roll the mixture into 1-inch balls and place them on a baking sheet lined with waxed paper. Flatten each ball with a flat-bottomed cup or your hand. Cover with another sheet of waxed paper and refrigerate for 60–90 minutes or until firm.
-
Dip in Chocolate: Melt the chocolate candy coating according to package directions. Using a fork, dip each mint patty into the melted chocolate, tapping off the excess. Place the coated patties back on the waxed paper.
-
Set and Store: Let the candies cool until the chocolate is firm. Store them in an airtight container. For longer storage, freeze them in single layers, separated by waxed paper.
Servings and Timing
Prep Time: 20 minutes
Servings: 60
Variations
-
Dark Chocolate: Use dark chocolate for a more intense flavor.
-
Colored Chocolate: Use white or colored chocolate coating for a fun twist.
-
Larger Patties: Make larger patties if you prefer a bigger minty bite.
Storage/Reheating
Store the mint patties in an airtight container at room temperature for up to 1 week or freeze them for up to 3 months.
FAQs
Can I use regular chocolate instead of candy coating?
Yes, but candy coating sets more easily and gives a smooth finish.
Can I use a different extract?
Yes, you can substitute peppermint extract for a more intense mint flavor.
How do I keep the patties from sticking to the pan?
Line the pan with waxed paper to prevent sticking.
Can I make these ahead of time?
Yes, these mint patties can be made ahead and stored in an airtight container for up to a week.
Can I freeze these patties?
Yes, they freeze well. Just layer them with waxed paper to prevent them from sticking together.
Conclusion
Chocolate Covered Mint Patties are a sweet, refreshing treat that’s easy to make and perfect for satisfying your chocolate cravings. With a cool mint center and a rich chocolate coating, they’re sure to be a hit at your next gathering or holiday event.
Print
Chocolate Covered Mint Patties
These buttery, soft blueberry biscuits are perfectly moist on the inside with a crispy, golden-brown crust. Topped with a tangy lemon glaze, they’re a delicious treat perfect for breakfast, dessert, or anytime you need a little sweetness.
- Total Time: 40 minutes
- Yield: 9 biscuits
Ingredients
- For the Biscuits:
- 2½ cups all-purpose flour, spooned and leveled
- ⅓ cup granulated sugar
- 1 tablespoon baking powder
- ¼ teaspoon salt
- 1¾ cups buttermilk (up to 2 cups)
- 1½ cups fresh blueberries
- ½ cup salted butter, melted (1 stick)
- For the Lemon Glaze:
- 1 cup powdered sugar
- 2 tablespoons fresh lemon juice
- ½ teaspoon vanilla extract
Instructions
- Preheat Oven: Preheat your oven to 450°F.
- Make the Biscuits: In a large mixing bowl, whisk together flour, sugar, baking powder, and salt. Slowly pour in the buttermilk, stirring gently until a sticky dough forms. If the dough seems dry, add a little more buttermilk. Be careful not to overmix. Gently fold in the blueberries, making sure they are evenly distributed without crushing them.
- Assemble and Bake: Pour the melted butter into the bottom of a 9×9-inch baking pan. Evenly spread the dough over the melted butter, smoothing it out with a spatula. Use a knife to cut the dough into 9 squares. Bake for 25–30 minutes, or until the tops are golden brown.
- Make the Glaze: In a small bowl, whisk together powdered sugar and lemon juice until smooth. Add vanilla extract. Adjust the consistency by adding more lemon juice to thin or more powdered sugar to thicken.
- Drizzle and Serve: Once the biscuits are done baking, let them cool slightly before drizzling with the lemon glaze. Serve warm and enjoy!
Notes
undefined
- Prep Time: 10 minutes
- Cook Time: 25–30 minutes
- Category: Dessert
- Method: Bake
- Cuisine: American
- Diet: Vegetarian
Nutrition
- Serving Size: 1 biscuit
- Calories: 275
- Sugar: 18g
- Sodium: 269mg
- Fat: 16g
- Saturated Fat: 10g
- Unsaturated Fat: 6g
- Trans Fat: undefined
- Carbohydrates: 32g
- Fiber: 1g
- Protein: 2g
- Cholesterol: 48mg

