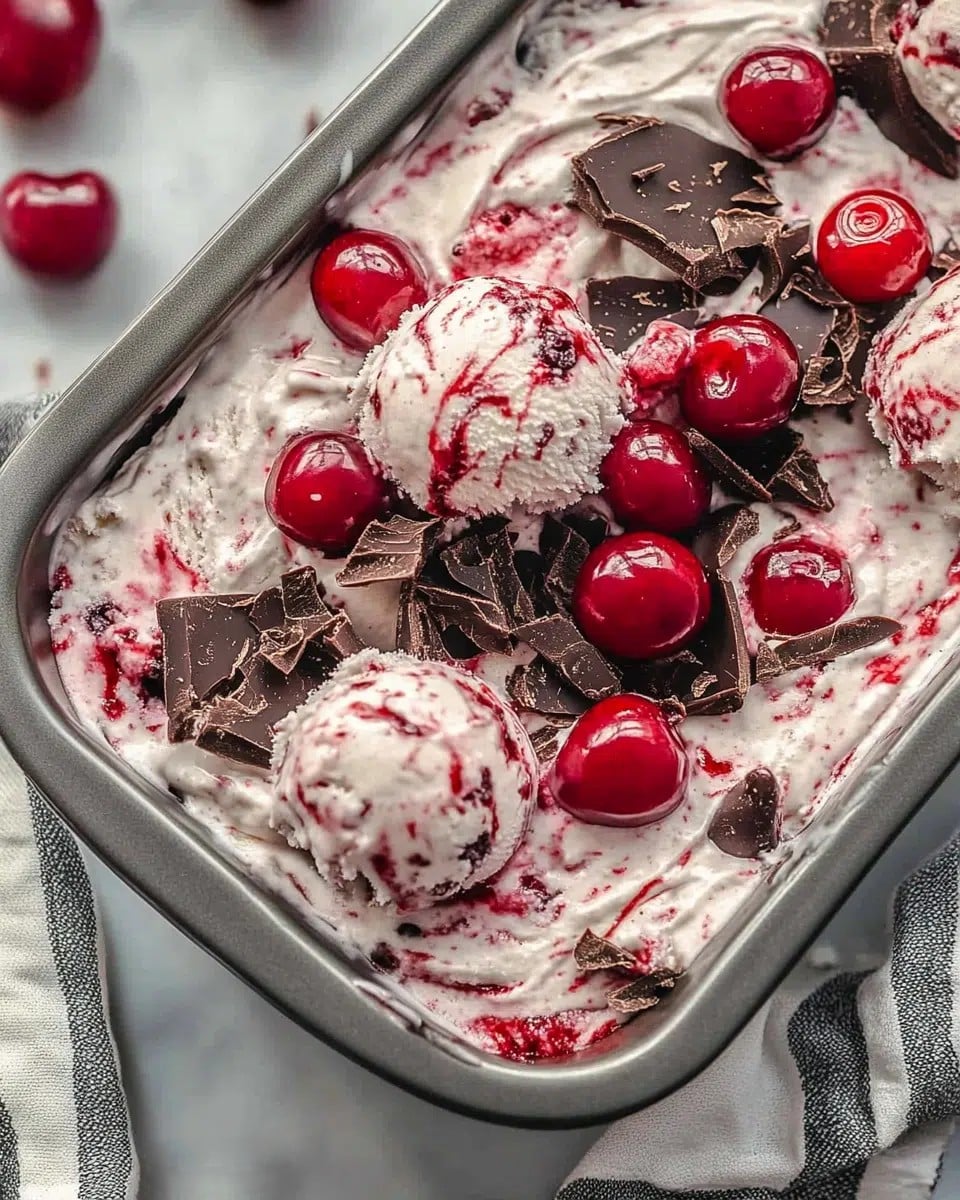
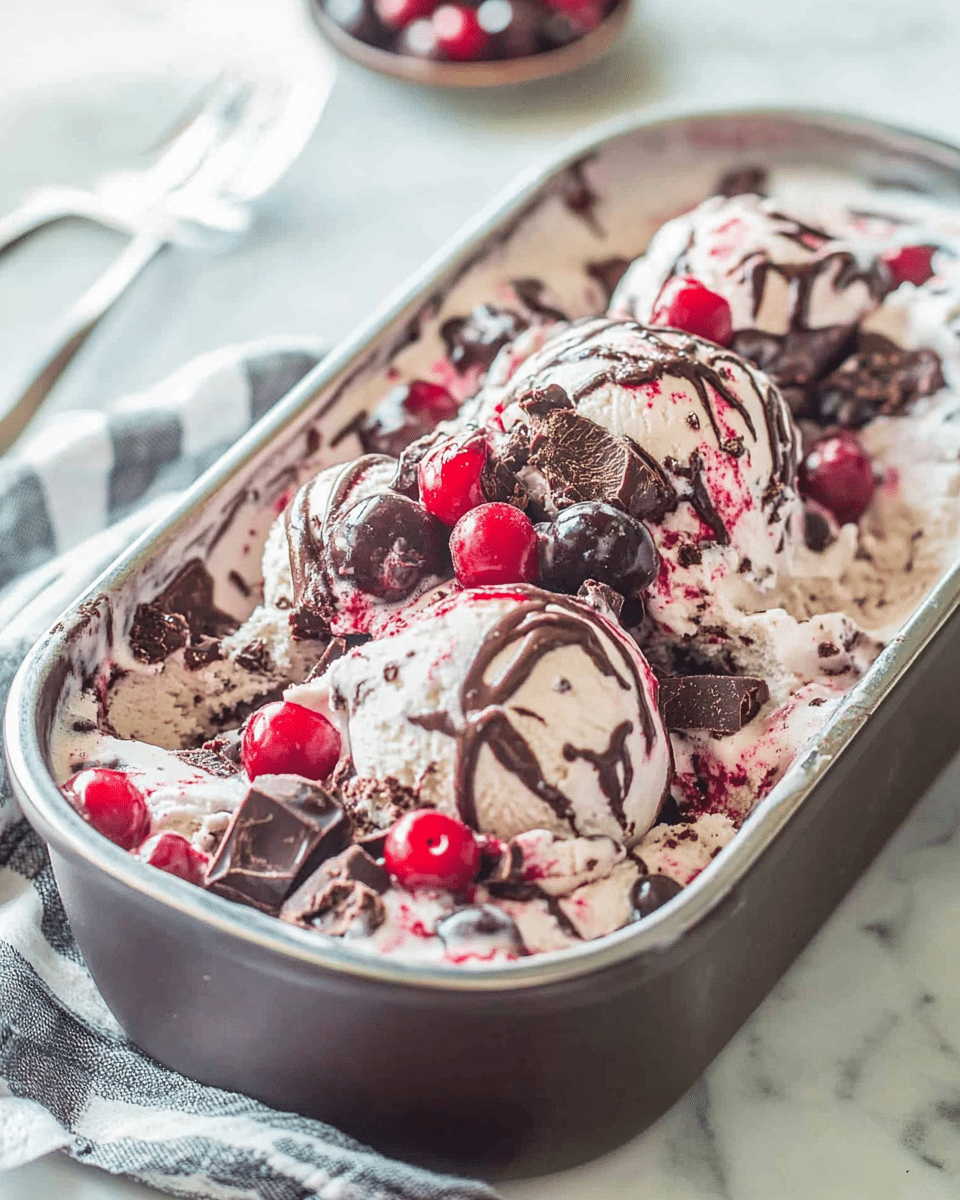
Indulge in the creamy, decadent goodness of Chocolate Cherry Cheesecake Ice Cream—a delightful dessert that combines the rich flavors of cheesecake, chocolate, and cherries in a frozen treat. With a simple Oreo crust, a smooth ice cream base, and bursts of cherry pie filling, this no-churn ice cream is the perfect way to cool off and satisfy your sweet tooth.
Why You’ll Love This Recipe
This Chocolate Cherry Cheesecake Ice Cream is a perfect combination of textures and flavors. The Oreo crust adds a satisfying crunch, while the creamy cheesecake base is both rich and refreshing. Chunks of Oreo cookies and sweet cherry pie filling are folded in to create a delightful contrast, making each bite a satisfying blend of chocolate, fruit, and cheesecake flavors. Best of all, it’s incredibly easy to make and doesn’t require an ice cream maker—just blend, fold, freeze, and enjoy!
Ingredients
For the crust:
-
12 Oreos
-
4 tbsp butter (softened)
For the ice cream:
-
8 oz cream cheese (softened)
-
8 oz whipped topping (thawed)
-
14 oz sweetened condensed milk
-
½ cup vanilla yogurt
-
1 tsp vanilla extract
-
1 cup cherry pie filling
(Tip: You’ll find the full list of ingredients and measurements in the recipe card below.)
Directions
-
Prepare the Oreo crust: Place the Oreos and softened butter in a food processor and pulse until the mixture becomes crumbly and sticks together. Set aside.
-
Make the ice cream base: In a large bowl, combine the cream cheese, whipped topping, sweetened condensed milk, vanilla yogurt, and vanilla extract. Use a hand mixer to blend thoroughly until smooth.
-
Add the mix-ins: Pour the Oreo mixture into the center of the ice cream base, then add the cherry pie filling on top. Do not stir.
-
Fold gently: Use a rubber spatula to gently fold the Oreos and cherry pie filling into the mixture—just 2 or 3 strokes are enough. Be careful not to overmix to maintain the chunks of cookies and fruit.
-
Freeze: Pour the mixture into a bread loaf pan or your preferred freezer container. Cover and freeze for at least 4 hours, or until set.
-
Serve & enjoy: Scoop the ice cream and enjoy the deliciously creamy chocolate cherry cheesecake treat!
Servings and Timing
-
Servings: 6
-
Prep Time: 10 minutes
-
Freezer Time: 4 hours
-
Total Time: 4 hours 10 minutes
Variations
-
Add chocolate chunks: For extra chocolatey goodness, fold in chopped chocolate chunks or chocolate chips along with the Oreos and cherries.
-
Add more fruit: Try adding sliced strawberries, raspberries, or blueberries for a fruity twist on this cheesecake ice cream.
-
Use a different crust: Instead of Oreos, use graham crackers, digestives, or even a nut-based crust for a unique base.
-
Make it dairy-free: Substitute the cream cheese, whipped topping, and condensed milk with dairy-free alternatives for a vegan-friendly version.
Storage/Reheating
-
Storage: Keep leftovers tightly covered in the freezer for up to a week. Be sure to place the ice cream in an airtight container to prevent freezer burn.
-
Reheating: Since this is a frozen dessert, there’s no need to reheat. Simply let it sit at room temperature for a few minutes to soften slightly for easier scooping if needed.
FAQs
Can I make this ice cream without an ice cream maker?
Yes! This recipe is no-churn, so no ice cream maker is needed. Simply mix, fold, freeze, and enjoy.
How long should I freeze the ice cream before serving?
Freeze for at least 4 hours, or until the ice cream is firm and set. You can freeze it longer if you’d like, but 4 hours is usually sufficient.
Can I use a different fruit besides cherries?
Absolutely! Feel free to use any fruit you prefer, such as strawberries, blueberries, or peaches, for a different flavor profile.
How do I store leftover ice cream?
Store leftovers in an airtight container in the freezer for up to a week for the best texture and flavor.
Can I add nuts to this ice cream?
Yes, you can fold in chopped nuts like almonds, walnuts, or pecans for a crunchy texture that complements the creamy base.
Is there a way to make this ice cream lighter?
You can reduce the sweetness and fat content by using light whipped topping or a reduced-fat cream cheese, though it may affect the texture and creaminess.
Can I use homemade cherry pie filling?
Yes, if you have homemade cherry pie filling, feel free to use it in place of the store-bought version. Just make sure it’s cooled and thickened before adding it to the mixture.
Can I make this ice cream ahead of time?
Yes, this ice cream can be made a day or two ahead of time. Just store it tightly covered in the freezer until you’re ready to serve.
How can I make this ice cream even more decadent?
Top your ice cream with whipped cream, extra cherries, or a drizzle of chocolate syrup just before serving for an extra indulgent treat.
Can I use low-fat or non-fat versions of the ingredients?
Yes, you can substitute some ingredients with their low-fat or non-fat versions, but keep in mind that the texture and creaminess may be slightly different.
Conclusion
Chocolate Cherry Cheesecake Ice Cream is an easy-to-make, indulgent dessert that’s perfect for satisfying your sweet tooth. With a creamy base, crunchy Oreo crust, and bursts of cherry pie filling, this treat offers a deliciously unique twist on classic cheesecake flavors. Whether you’re making it for a special occasion or simply to enjoy at home, this no-churn ice cream is sure to impress with its rich, creamy, and decadent flavors. Enjoy every scoop of this frozen delight!
Print
Chocolate Cherry Cheesecake Ice Cream
A creamy, no-churn chocolate cherry cheesecake ice cream with a sweet Oreo crust, cherries, and a luscious cheesecake base, perfect for a decadent dessert.
- Total Time: 4 hours 10 minutes
- Yield: 6 servings
Ingredients
- Oreo Crust:
- 12 Oreos
- 4 tbsp butter (softened)
- Ice Cream Base:
- 8 oz cream cheese (softened)
- 8 oz whipped topping (thawed)
- 14 oz sweetened condensed milk
- ½ cup vanilla yogurt
- 1 tsp vanilla extract
- Mix-ins:
- 1 cup cherry pie filling
Instructions
- Prepare the Oreo Crust: Place the Oreos and softened butter in a food processor and pulse until the mixture becomes crumbly and sticks together. Set aside.
- Make the Ice Cream Base: In a large bowl, combine the cream cheese, whipped topping, sweetened condensed milk, vanilla yogurt, and vanilla extract. Use a hand mixer to blend thoroughly until smooth.
- Add the Mix-ins: Pour the Oreo mixture into the center of the ice cream base, then add the cherry pie filling on top. Do not stir.
- Fold Gently: Use a rubber spatula to gently fold the Oreos and cherry pie filling into the mixture—just 2 or 3 strokes are enough. Be careful not to overmix.
- Freeze: Pour the mixture into a bread loaf pan or your preferred freezer container. Cover and freeze for at least 4 hours until set.
- Serve & Enjoy: Scoop the ice cream and enjoy the deliciously creamy chocolate cherry cheesecake treat!
Notes
- Tip: For a fun variation, try adding chopped chocolate chunks or more fruit to customize this treat to your liking.
- Storage: Keep leftovers tightly covered in the freezer for up to a week.
- Prep Time: 10 minutes
- Cook Time: undefined
- Category: undefined
- Method: undefined
- Cuisine: American
- Diet: Vegetarian
Nutrition
- Serving Size: 1 serving
- Calories: 672
- Sugar: 54g
- Sodium: 330mg
- Fat: 40g
- Saturated Fat: 18g
- Unsaturated Fat: 18g
- Trans Fat: 0g
- Carbohydrates: 78g
- Fiber: 2g
- Protein: 6g
- Cholesterol: 50mg
