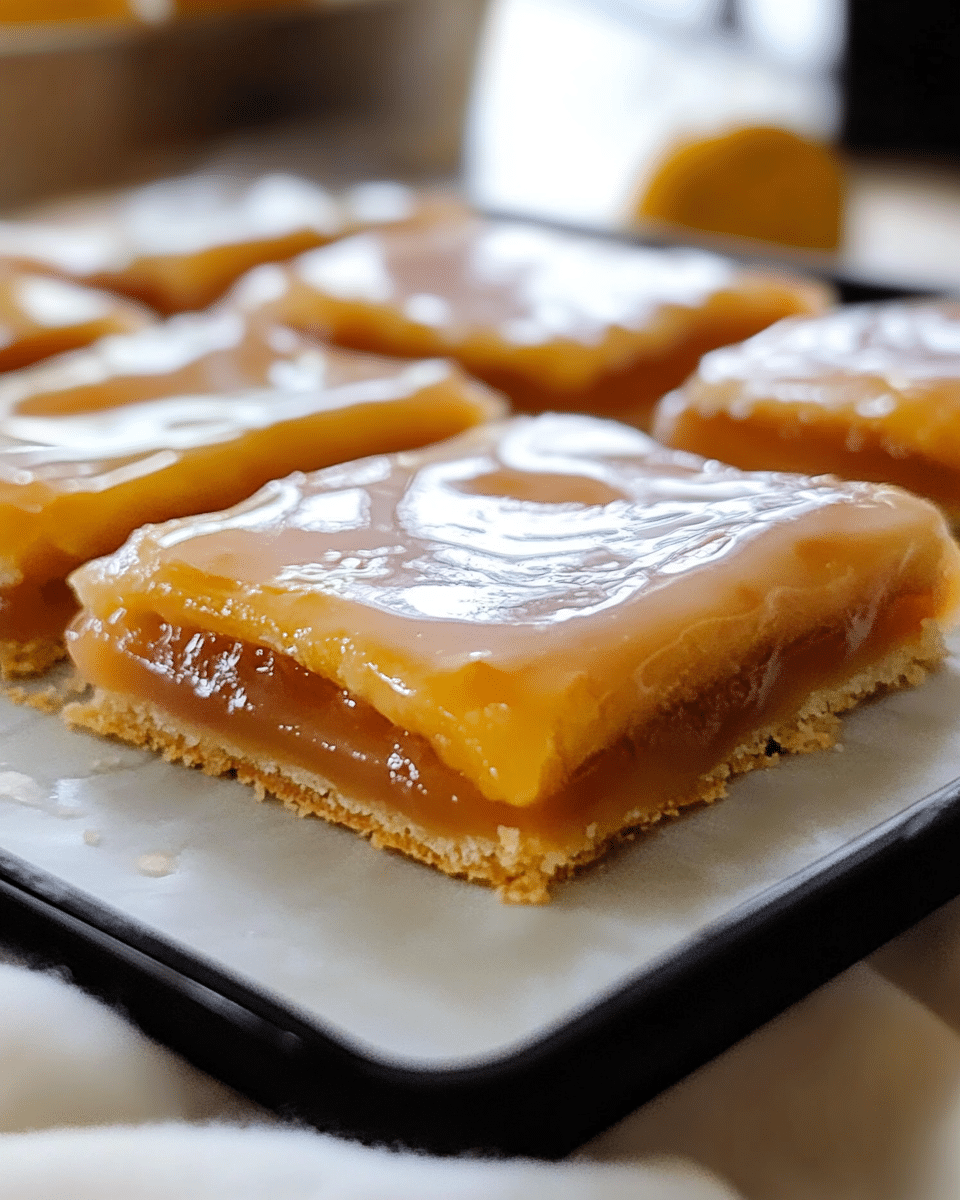
Chicago-Style Bakery Apple Slices are a delightful treat featuring a flaky, buttery crust filled with sweet, spiced apple pie filling, all topped with a smooth, sweet glaze. These delicious apple slices are perfect for dessert, as a snack with coffee, or for any occasion that calls for something comforting and sweet. They’re easy to prepare, and the result is a perfect balance of textures and flavors!
Why You’ll Love This Recipe
These apple slices are a great twist on the classic apple pie. With a buttery, flaky crust that melts in your mouth, the spiced apple filling adds the perfect amount of sweetness and warmth. The glaze on top is what truly sets them apart, giving these apple slices a smooth, glossy finish that enhances every bite. Plus, they’re simple to make and perfect for sharing with friends and family.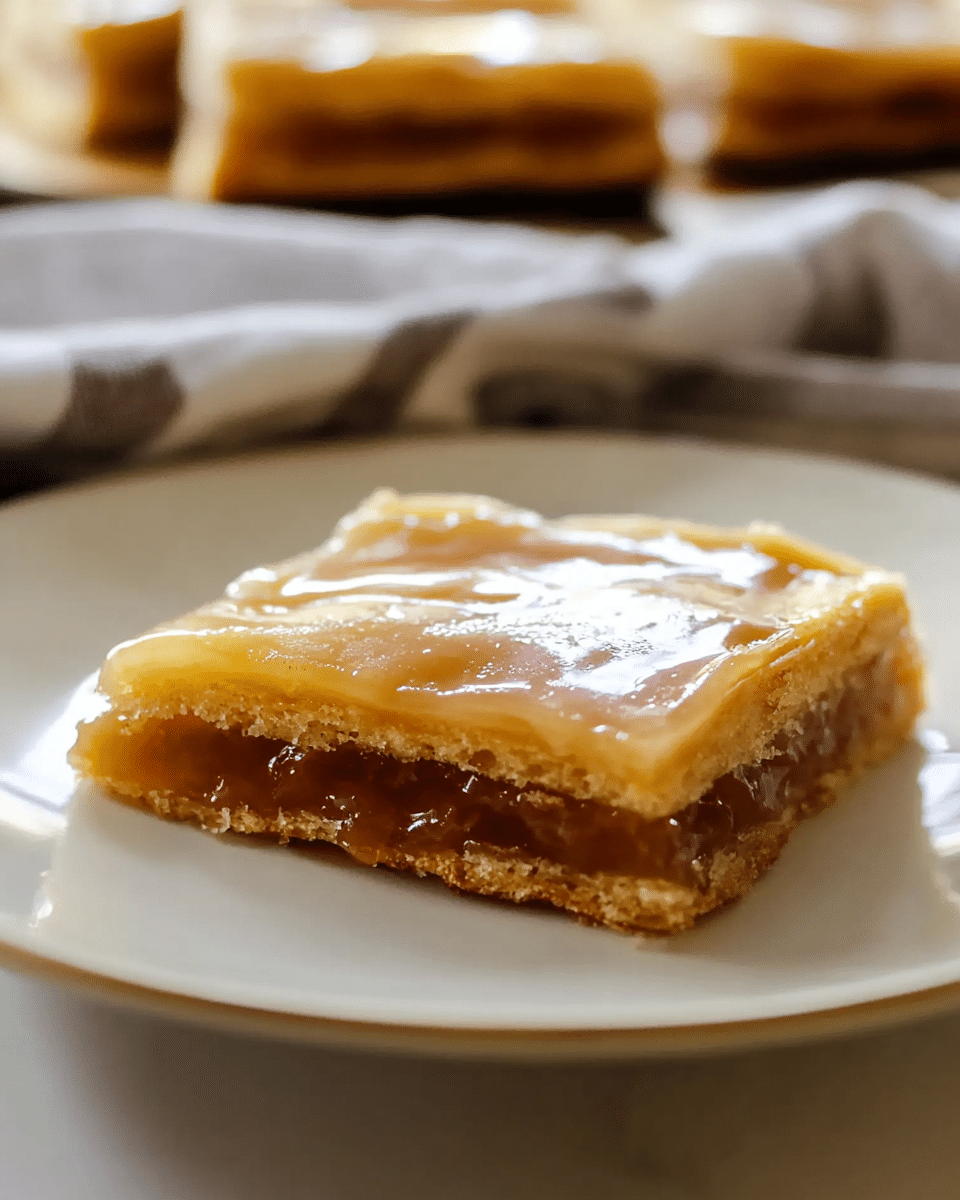
Ingredients
For the Pie Dough:
-
4 cups all-purpose flour
-
1 tablespoon granulated sugar
-
1 teaspoon salt
-
1 1/4 cups unsalted butter, chilled (2 1/2 sticks)
-
1/2 cup ice water (plus more as needed)
For the Filling:
-
4 cups apple pie filling (canned is fine)
For the Glaze:
-
1 cup powdered sugar
-
2 tablespoons unsalted butter, softened
-
1 teaspoon vanilla
-
2 tablespoons whole milk
(Tip: You’ll find the full list of ingredients and measurements in the recipe card below.)
Directions
For the Pie Dough:
-
In a large bowl, stir together the flour, sugar, and salt.
-
Grate one stick of butter into the flour mixture using a cheese grater. If the butter gets too soft, place it in the freezer to firm up before continuing. Repeat this process until all butter is grated, stirring the mixture between sticks. (Alternatively, cube the butter and use a pastry blender or two forks to cut it in.)
-
Create a well in the center of the flour mixture and add 1/2 cup of ice water. Toss with a fork until combined.
-
Gradually add 2 tablespoons of cold water at a time, stirring after each addition, until the dough is moist and holds together easily. The dough should not be sticky and should still have small pieces of butter visible.
-
On a lightly floured surface, knead the dough quickly to bring it together. Divide it in half and flatten each half into a 1-inch thick rectangle.
-
Wrap each rectangle in plastic wrap and chill for at least 30 minutes.
To Assemble:
-
Preheat the oven to 400°F. Set aside a 9×13-inch jelly roll pan.
-
Lightly dust your work surface with flour. Roll out one rectangle of dough to fit the size of the jelly roll pan. Press it into the bottom of the pan.
-
Spread the apple filling evenly over the dough.
-
Roll out the second rectangle of dough to the same size and place it over the apple filling. Pinch the edges of the dough together (don’t worry about sealing it completely).
-
Slice a few vents in the top crust to allow steam to escape.
-
Bake for about 40 minutes, rotating the pan halfway through, until the crust is golden brown.
-
Remove the pan from the oven and cool on a wire rack.
For the Glaze:
-
Beat together the powdered sugar, butter, vanilla, and milk until smooth.
-
Spread the glaze evenly over the top of the cooled apple slices. Let it set and harden before slicing into squares.
Servings and Timing
-
Servings: 12
-
Prep Time: 15 minutes
-
Cook Time: 40 minutes
-
Inactive Time: 30 minutes
-
Total Time: 50 minutes
Variations
-
Spices: Add cinnamon, nutmeg, or allspice to the apple filling for an extra touch of warmth and spice.
-
Nuts: For added texture, consider adding chopped pecans or walnuts to the filling.
-
Crust Variations: Try using a store-bought pie dough for a quicker alternative, or make a crumble topping for a different texture.
Storage/Reheating
-
Storage: Store any leftover apple slices in an airtight container at room temperature for up to 3 days. They can also be stored in the fridge for up to a week.
-
Freezing: These apple slices freeze well. Wrap them tightly in plastic wrap and store in an airtight container for up to 3 months. Let them thaw at room temperature before serving.
-
Reheating: To warm up leftovers, simply pop them in the microwave for a few seconds or reheat in the oven at 350°F until warmed through.
FAQs
1. Can I use fresh apples instead of canned pie filling?
Yes, you can make your own apple filling by peeling and slicing fresh apples, then cooking them with sugar, cinnamon, and a little cornstarch to thicken the sauce.
2. Can I make this dessert ahead of time?
Yes, you can make these apple slices ahead of time. Just store them in an airtight container and keep them at room temperature. You can also freeze them for longer storage.
3. Can I skip the glaze?
While the glaze adds a nice touch, you can skip it if you prefer a more traditional, less sweet version of apple slices.
4. Can I make the dough by hand instead of grating the butter?
Yes, you can cut the butter into the flour using a pastry cutter or two forks if you don’t have a cheese grater.
5. Can I make this recipe without a jelly roll pan?
If you don’t have a jelly roll pan, you can use a similar-sized baking dish, such as an 8×8-inch square pan, but you may need to adjust the cooking time slightly.
6. Can I add a crumb topping instead of the second crust?
Yes, you can add a crumb topping made of flour, butter, and sugar for a different texture. Just sprinkle it over the apple filling before baking.
7. How can I make these apple slices more decadent?
For a richer dessert, try adding a scoop of vanilla ice cream or a dollop of whipped cream on top when serving.
Conclusion
Chicago-Style Bakery Apple Slices are a wonderful dessert that combines a buttery, flaky crust with sweet, spiced apple filling and a luscious glaze. It’s perfect for any occasion, whether you’re hosting a gathering, serving it for dessert after a meal, or simply indulging in a comforting treat. With simple ingredients and an easy-to-follow process, these apple slices are a delicious homemade option that’s sure to impress!
Print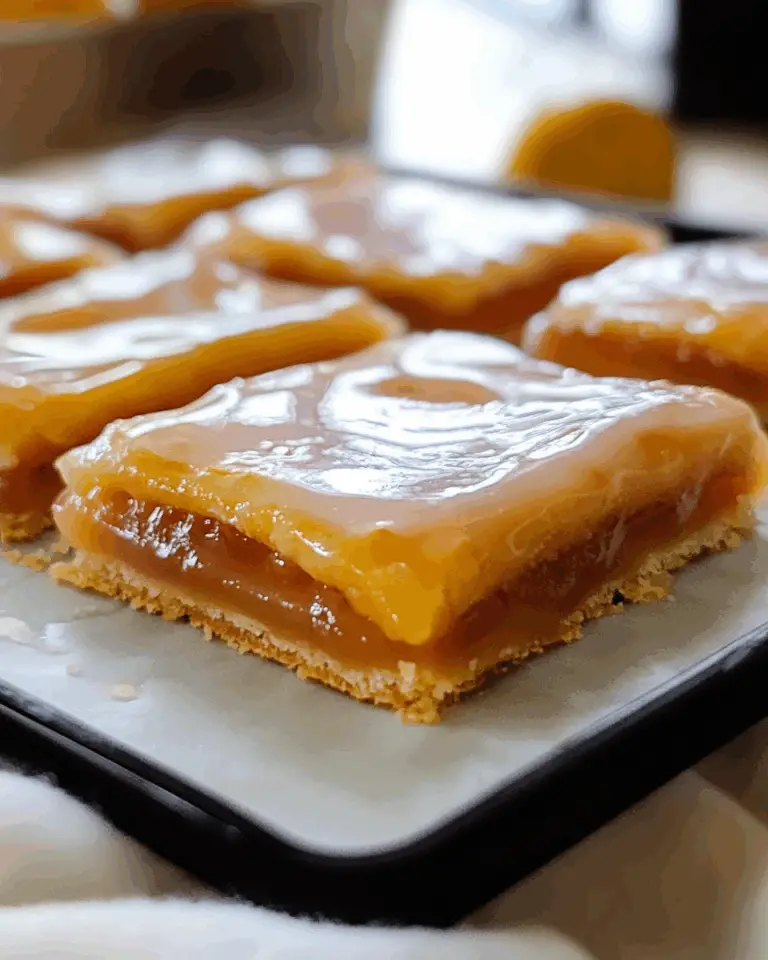
Chicago-Style Bakery Apple Slices
Delicious, flaky apple slices made with a homemade pie dough, filled with apple pie filling, and topped with a sweet glaze. Perfect for a sweet treat or dessert.
- Total Time: 50 minutes
- Yield: 12 servings
Ingredients
- For the Pie Dough:
- 4 cups all-purpose flour
- 1 tablespoon granulated sugar
- 1 teaspoon salt
- 1 ¼ cups unsalted butter, chilled (2 ½ sticks)
- ½ cup ice water (plus more as needed)
- For the Filling:
- 4 cups apple pie filling (canned is fine)
- For the Glaze:
- 1 cup powdered sugar
- 2 tablespoons unsalted butter, softened
- 1 teaspoon vanilla
- 2 tablespoons whole milk
Instructions
- For the Pie Dough: In a large bowl, stir together the flour, sugar, and salt.
- Grate one stick of butter into the flour mixture using a cheese grater. If the butter gets too soft, place it in the freezer to firm up before continuing. Repeat this process until all butter is grated, stirring the mixture between sticks. (Alternatively, you can cube the butter and use a pastry blender or two forks to cut it in.)
- Create a well in the center of the flour mixture, then add ½ cup of ice water. Toss with a fork until combined.
- Gradually add 2 tablespoons of cold water at a time, stirring after each addition, until the dough is moist and holds together easily. The dough should not be sticky and should still have small pieces of butter visible.
- On a lightly floured surface, knead the dough quickly to bring it together. Divide it in half and flatten each half into a 1-inch thick rectangle.
- Wrap each rectangle in plastic wrap and chill for at least 30 minutes.
- To Assemble: Preheat the oven to 400°F. Set aside a 9×13-inch jelly roll pan.
- Lightly dust your work surface with flour. Roll out one rectangle of dough to fit the size of the jelly roll pan. Press it into the bottom of the pan.
- Spread the apple filling evenly over the dough.
- Roll out the second rectangle of dough to the same size, then lay it over the apple filling. Pinch the edges of the dough together (don’t worry about sealing it completely).
- Slice a few vents in the top crust to allow steam to escape, then bake for about 40 minutes, rotating the pan halfway through, until the crust is golden brown.
- Remove the pan from the oven and cool on a wire rack.
- For the Glaze: Beat together the powdered sugar, butter, vanilla, and milk until smooth.
- Spread the glaze evenly over the top of the cooled apple slices. Let it set and harden before slicing into squares.
Notes
- Ensure the butter stays cold throughout the pie dough process to achieve a flaky crust.
- If you don’t have a jelly roll pan, you can use any similar-sized baking dish.
- Feel free to use homemade apple pie filling if you prefer over canned filling.
- This can be stored in an airtight container at room temperature for up to 3 days or in the fridge for up to a week.
- Prep Time: 15 minutes
- Cook Time: 40 minutes
- Category: Main Dish
- Method: Baked
- Cuisine: Western
- Diet: Vegetarian
Nutrition
- Serving Size: 1 serving
- Calories: 250
- Sugar: 20g
- Sodium: 90mg
- Fat: 12g
- Saturated Fat: 7g
- Unsaturated Fat: 4g
- Trans Fat: 0g
- Carbohydrates: 35g
- Fiber: 2g
- Protein: 2g
- Cholesterol: 25mg

